LOVEly Instruction: Low-prep, teacher-made materials
- Leslie

- Feb 9, 2022
- 3 min read
Confession: I love the "fancy" teacher stuff. I love shopping on Amazon, perusing Pinterest, and envisioning all the shiny, new things in my classroom.
But let's face it. I need effective tools that are sensible for student use, easy to organize, and cost-efficient to replace. Another let's-face-it truth: kids are hard on materials. Materials get broken, misplaced, drawn on... you name it!
So today I want to share a couple of my favorite short-cuts for material preparation, organization, and student use.
* Let's talk about alphabet letter tiles. I use them daily, as we apply new phonics skills and review previously-taught ones. Those "fancy" magnetic letter sets are so super, and one set goes a long way for me to use, in instruction, at my table. However, individual sets for a class of 20+ kids??? Nope. Not happening. This is my version of alphabet letter tile sets for my students. I make them every year in the summer, when I have time to prep them once.
These are my handmade letter tiles. I use craft foam, which is super affordable, and you can easily replace a letter when lost or add to your letter bags as your students learn new phonics concepts throughout the year! I make one set for each student to include in their phonics bags. If you don't have time to make a set for each student, then just make enough for each student at your small-group table! As you can see, these are easy to color-code as well.
Another tip I love to share: when making your own alphabet letter tiles for student use, help support your students with confusing letter reversals by drawing a line along the bottom of these letters. Remind them that the “bellies sit” on the lines, just like in writing. This will help alleviate confusion and will minimize the instructional time YOU have to spend helping them make corrections! Win, win!

* Shifting gears a bit, let's talk about red words. If you are familiar with the Orton-Gillingham approach, and you already use the red word procedure to support your students' learning and retention of non-phonetic words, then you know it can be a bit challenging at times to juggle words among the visual and auditory portions of instruction.
This is my favorite way to organize red words for each group/student/class! This ensures that you will not waste valuable time juggling multiple sets of words in clips or bands AND it’s easy to move them from one point of instruction to another without any hassle or mixups! This little bit of organization with small expandable file pockets saves me SO much time!
* Hands-on instruction and practice requires hands-on materials, which can be messy when it comes to managing all of those little materials for little hands! If you have a baby at home (or know someone who does) don't throw away those baby food containers! They are perfect for organizing student sets of alphabet letters or letter tiles! The size is just right, and they are easy for students to open! Slap a label on top, and it looks quite "fancy." 😂
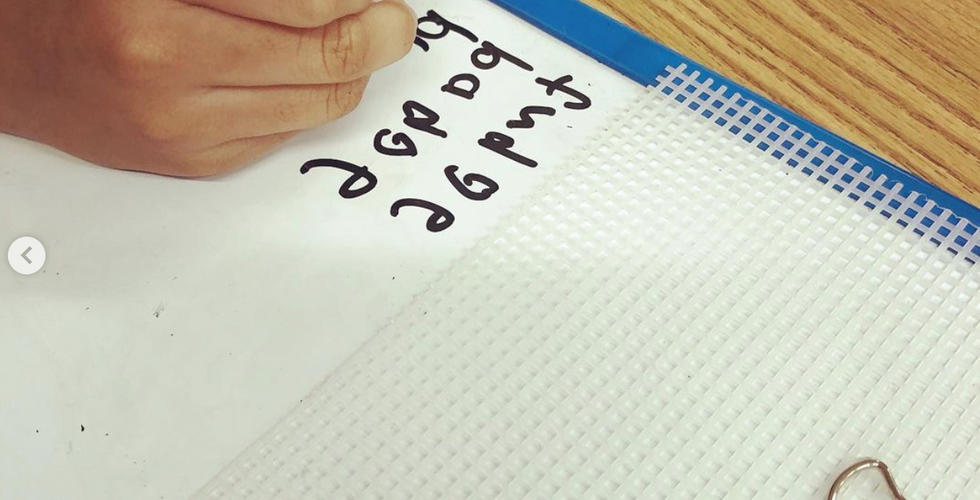
* Multisensory materials are at the top of my purchasing list every year. However, when I encounter a way to modify materials I already have to enhance the experience for my students, then I certainly do so! This is a way to easily create an enhanced multisensory experience with basic white boards!
I saw this idea a couple of years ago and instantly implemented it into my classroom with materials I already had on-hand. Students practice tracing phonics concepts onto the tactile screen first before writing, articulating every sound-spelling as they work! If students struggle with a particular spelling pattern during dictation, then have them pause and go back to the screen to trace-and-articulate the sound-spelling for review! You can easily move between the sensory experience and writing, as needed, within the same space! Flip through the slideshow below to see a few of my students using these modified white boards.
Well, that's all for today! I hope you have found something you can use from today's post!


I love your organizing ideas, thank you for sharing! Quick question, with the sight words file tabs, I cant figure what you mean by the visual and auditory tabs. Do you keep the sight words the student is working on, under the visual tab? And with the auditory tab, are these the sight Words the students are spelling?
Thank you in advance for clarification. i
teally excited to try out all your organizing ideas